The Media Library application lets you add a file download section to your pages, through which users can search and download files from a file library.
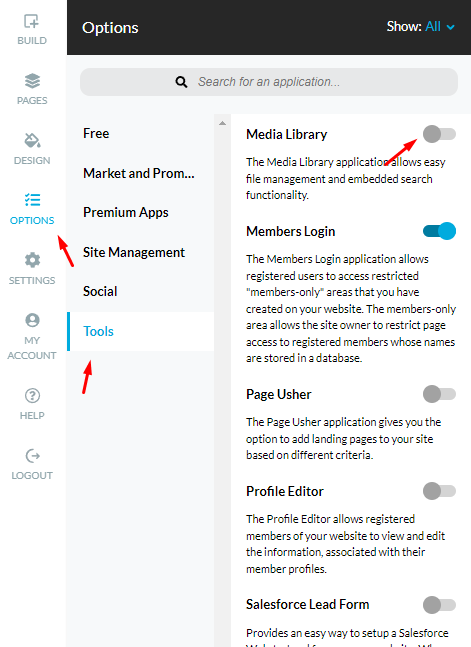
Go to Options found on the Left Menu, click on the sliding button, and then Activate.
Once done, the application can be dragged and dropped onto any page via the Build menu.
The Media Library element is added to a page in the same manner as any other content element. Simply drag-and-drop the Media Library on a blue area of the page to apply the element wherever you want it to appear.
Mouseover the application and click the cogwheel icon to open the properties for the Media Library:
- Library Name: This name will be used only internally.
- Header Title: Title of the Media Library that will be seen by end-users.
- Show Search: Allow visitors to search through the files in the Media Library.
- Show Description: Visitors will be able to see description for each file.
- Items Per Page: How many files should be shown per page.
Once added on a page, this is how the Media Library will be displayed (note that the "Add New File" button will appear only in Admin View of the page):
Add Files
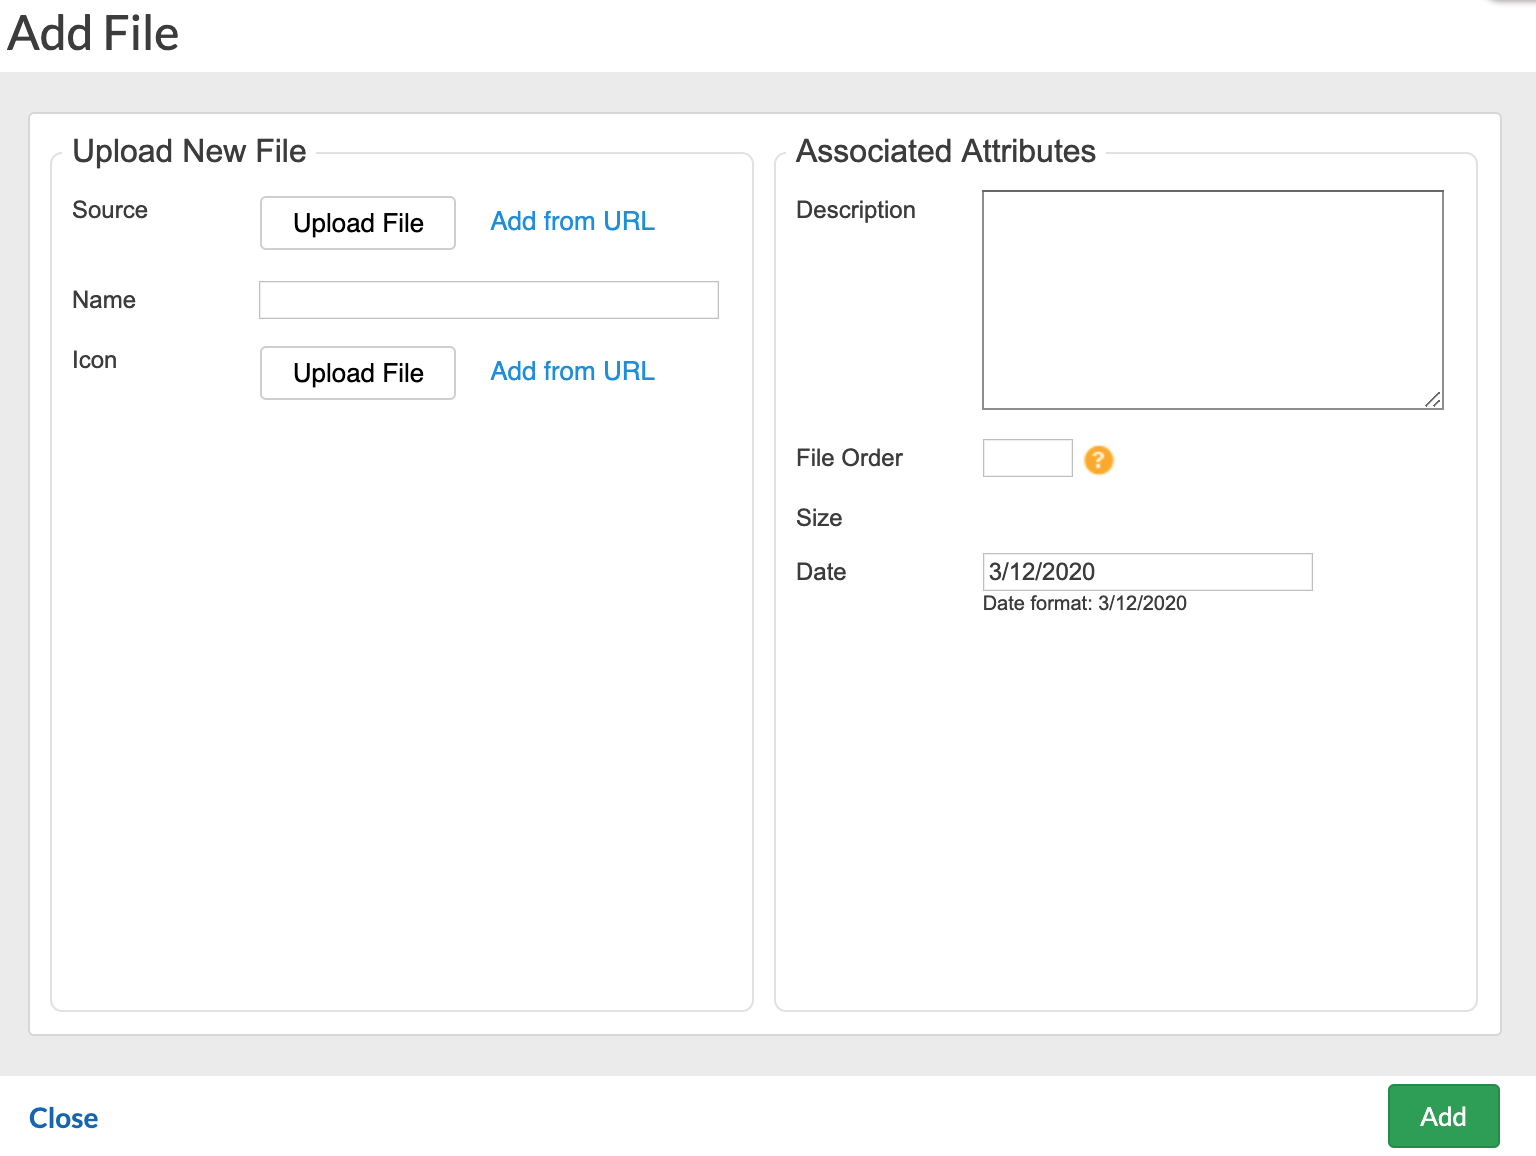
In order to insert files in the Media Library, click on the "Add New File" button. The following window will open:
- Source - Files can be browsed from the file system, or from the web.
- Name - Specify a name for the file.
- Icon - You can upload a custom icon that will appear next to the file's name.
- Description - Brief description of the file (it will appear under the file's name).
- File Order - You can change where the file is shown in the library by setting a file order. Number 1 means on the top.
- Date - You can specify a date for the file.
Once you have added files, here is how the Media Library will be displayed for end-users:
Customize the appearance of the Media Library
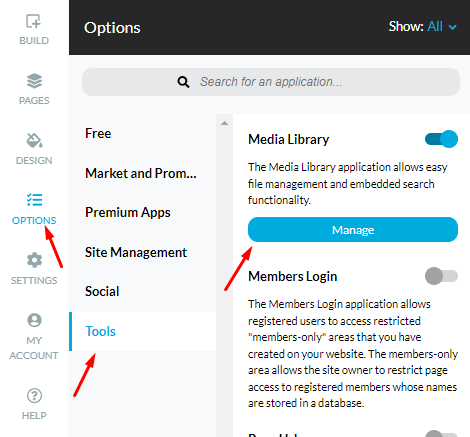
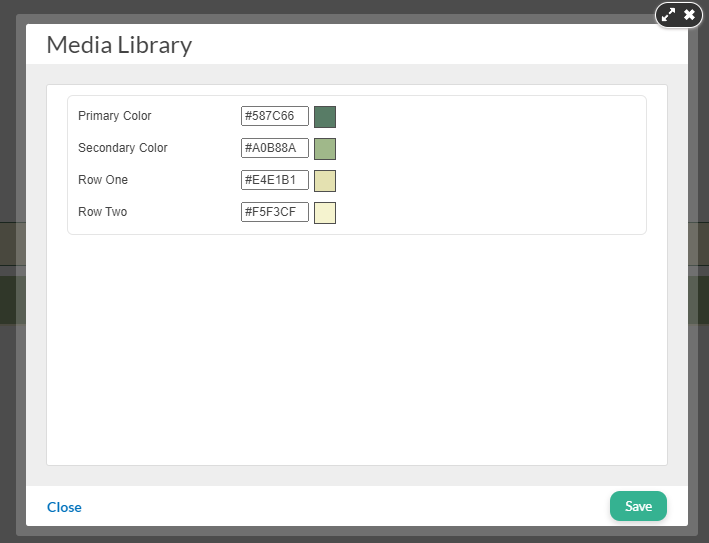
You can customize the background color of different sections of the Media Library from by clicking on the Manage button in the Options menu.


